How do I enable Wi-Fi?
Overview
TinyPilot supports wireless networking, so you can connect it to your Wi-Fi network and access the web interface wirelessly.
Wi-Fi generally has noticeably slower performance than a wired Ethernet connection. TinyPilot's Wi-Fi adaptor is disabled by default, but you can enable it and join it to your network if you prefer the convenience of a wireless connection.
Enabling Wi-Fi
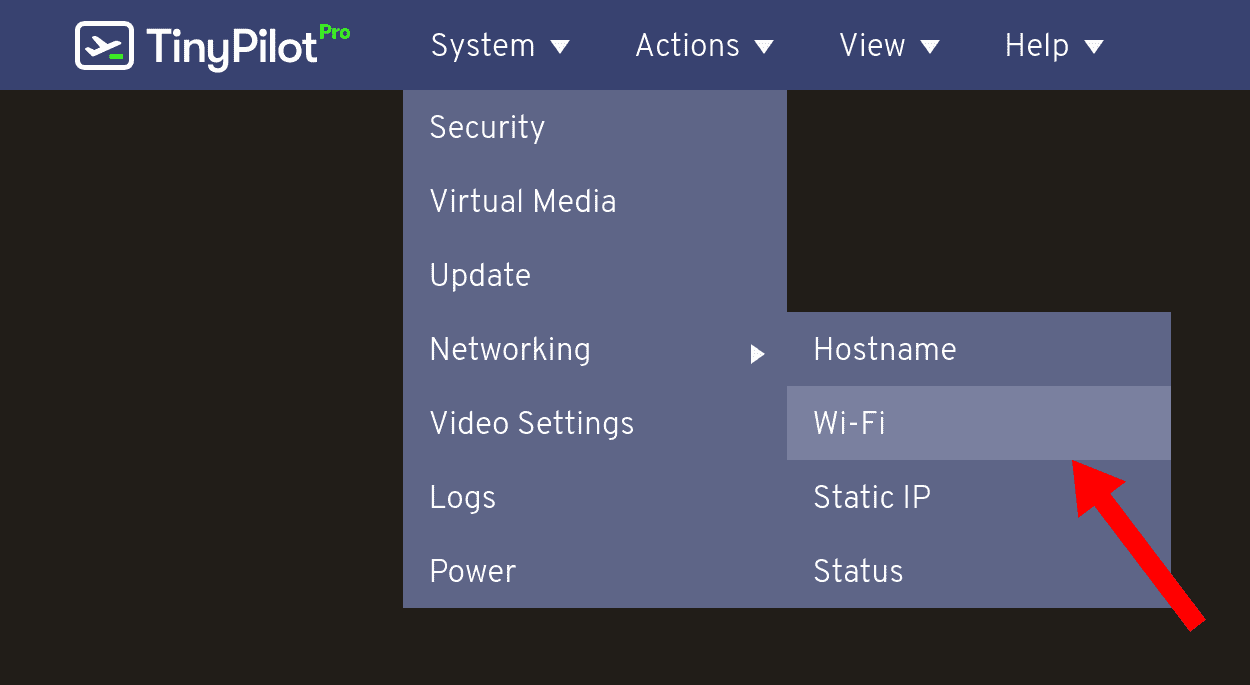
To enable Wi-Fi, navigate to System > Networking > Wi-Fi on your TinyPilot's web interface.

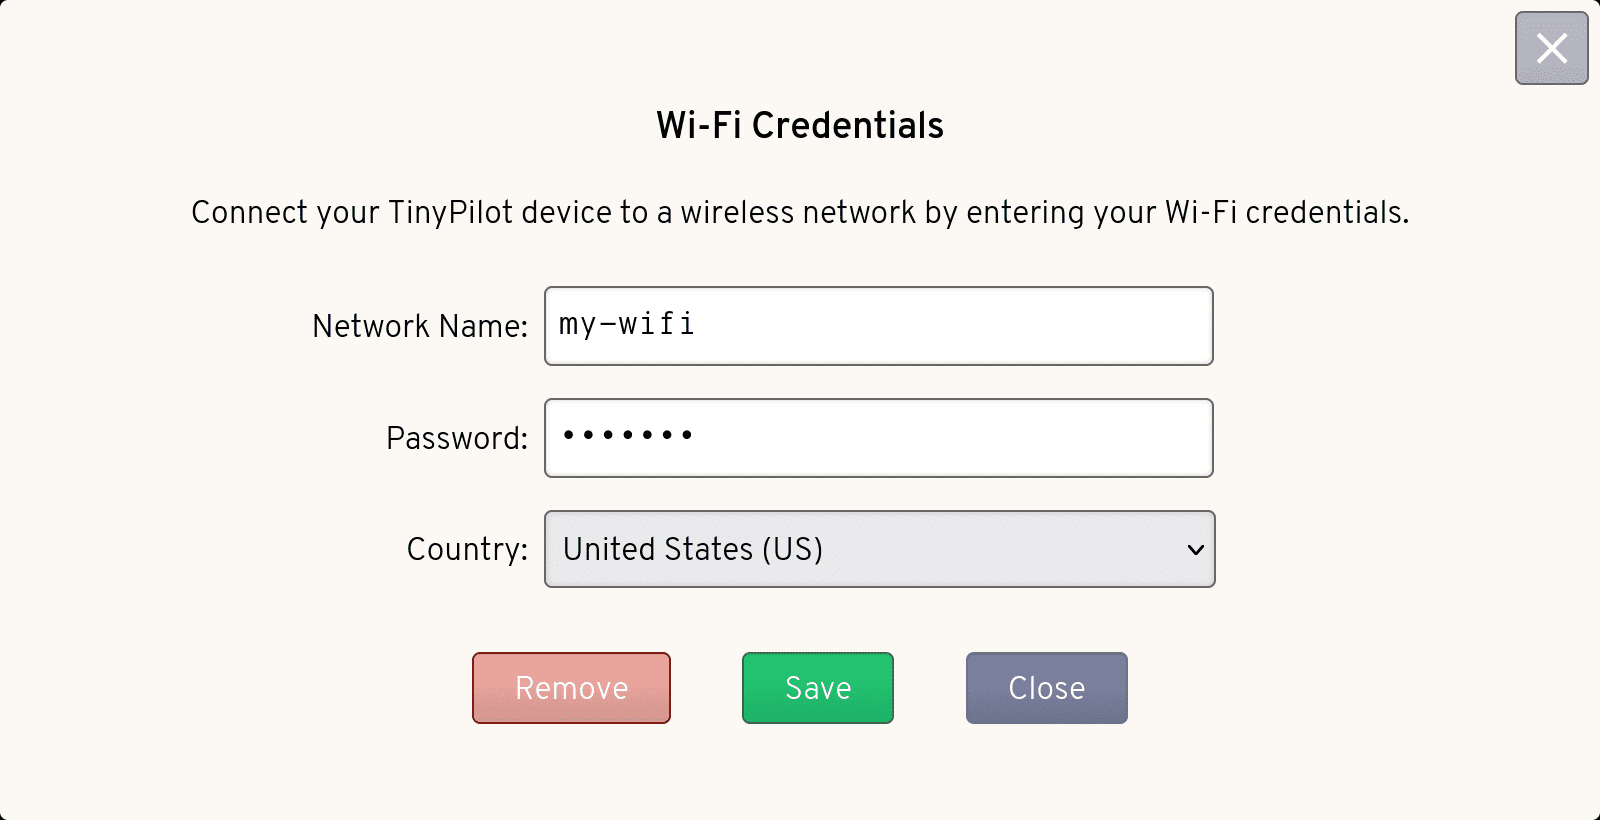
Enter your desired Wi-Fi network name and password in the text boxes, then select your country from the drop-down menu and click the "Save" button.

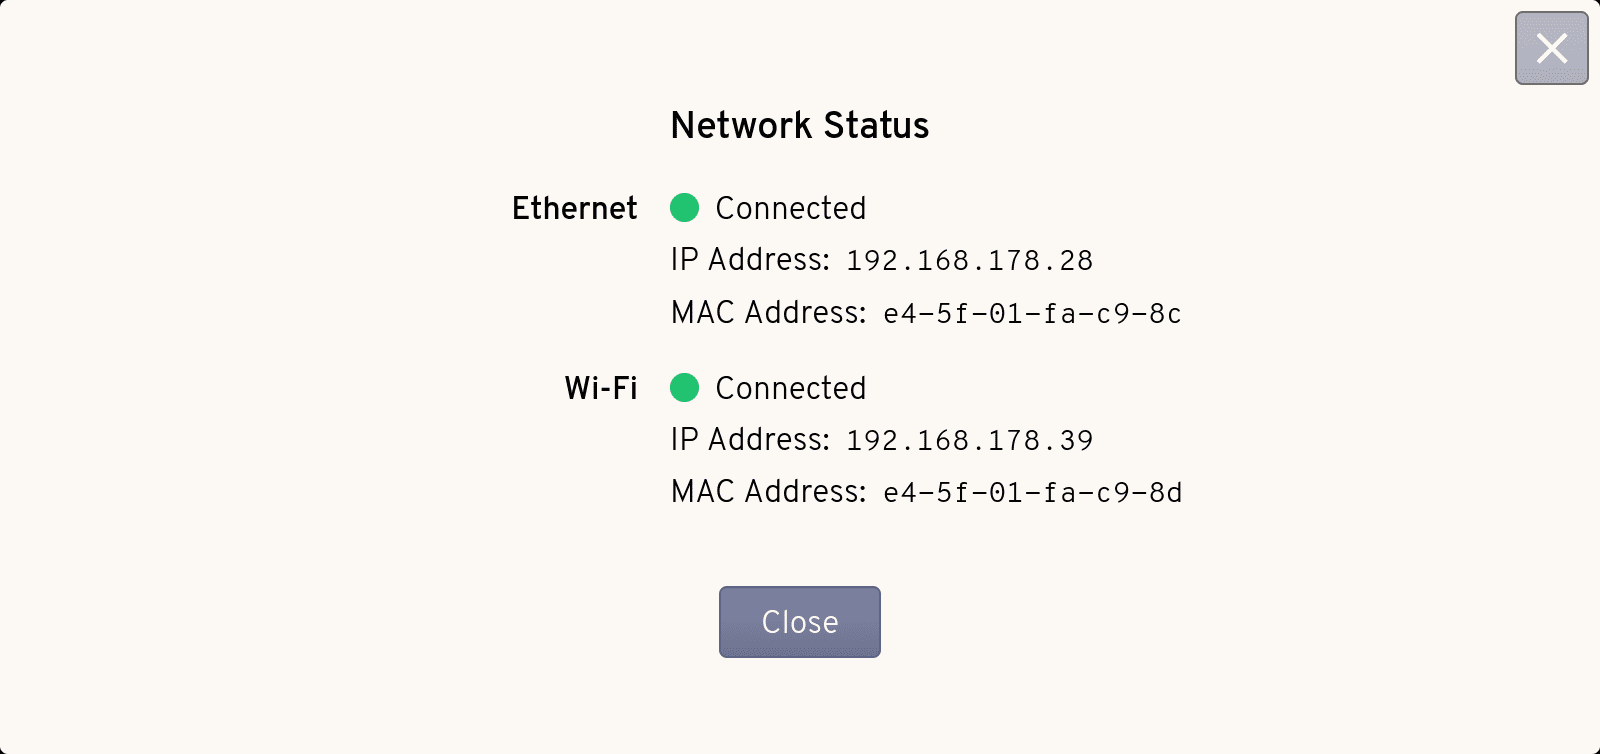
To view the status of your TinyPilot's Wi-Fi connection, navigate to System > Networking > Status on your TinyPilot's web interface.

Reducing latency
Connecting to your TinyPilot over Wi-Fi instead of a wired Ethernet connection usually increases latency. You can reduce latency by tuning your video settings.
Disabling Wi-Fi
To disable Wi-Fi on your TinyPilot, navigate to System > Networking > Wi-Fi on your TinyPilot's web interface and click the "Remove" button.
You can turn Wi-Fi back on by following the steps under Enabling Wi-Fi.
Managing Wi-Fi via SSH (deprecated)
To enable Wi-Fi via ssh, SSH in to your TinyPilot device, and specify your two-character country code, your Wi-Fi SSID, and your Wi-Fi passphrase:
WIFI_COUNTRY="US"
WIFI_SSID="ExampleSSID"
# The leading space on the next line excludes it from the shell's history.
 WIFI_PASSPHRASE="SecretPassphrase"
After you've specified your Wi-Fi network details, run the following to apply the settings to your TinyPilot and restart your device:
sudo raspi-config nonint do_wifi_country "${WIFI_COUNTRY}" && \
  sudo raspi-config nonint do_wifi_ssid_passphrase "${WIFI_SSID}" "${WIFI_PASSPHRASE}" && \
  sudo reboot
When you reboot, if you type ifconfig, you should see the wireless connection listed under wlan0.
To disable Wi-Fi via ssh, the following command will immediately disconnect and disable your TinyPilot device's Wi-Fi:
sudo rfkill block wlan