How do I set a static IP address?
Most routers use DHCP to automatically assign an IP address to your TinyPilot. Under DHCP, TinyPilot receives whatever IP address the router has available, and this IP address may change.
In some cases, it's helpful to configure your TinyPilot with a static IP address. A static IP address does not change, even if you reboot your TinyPilot or your router.
Managing a static IP address through the web UI (recommended)
This feature requires TinyPilot Pro 2.6.3 or later.
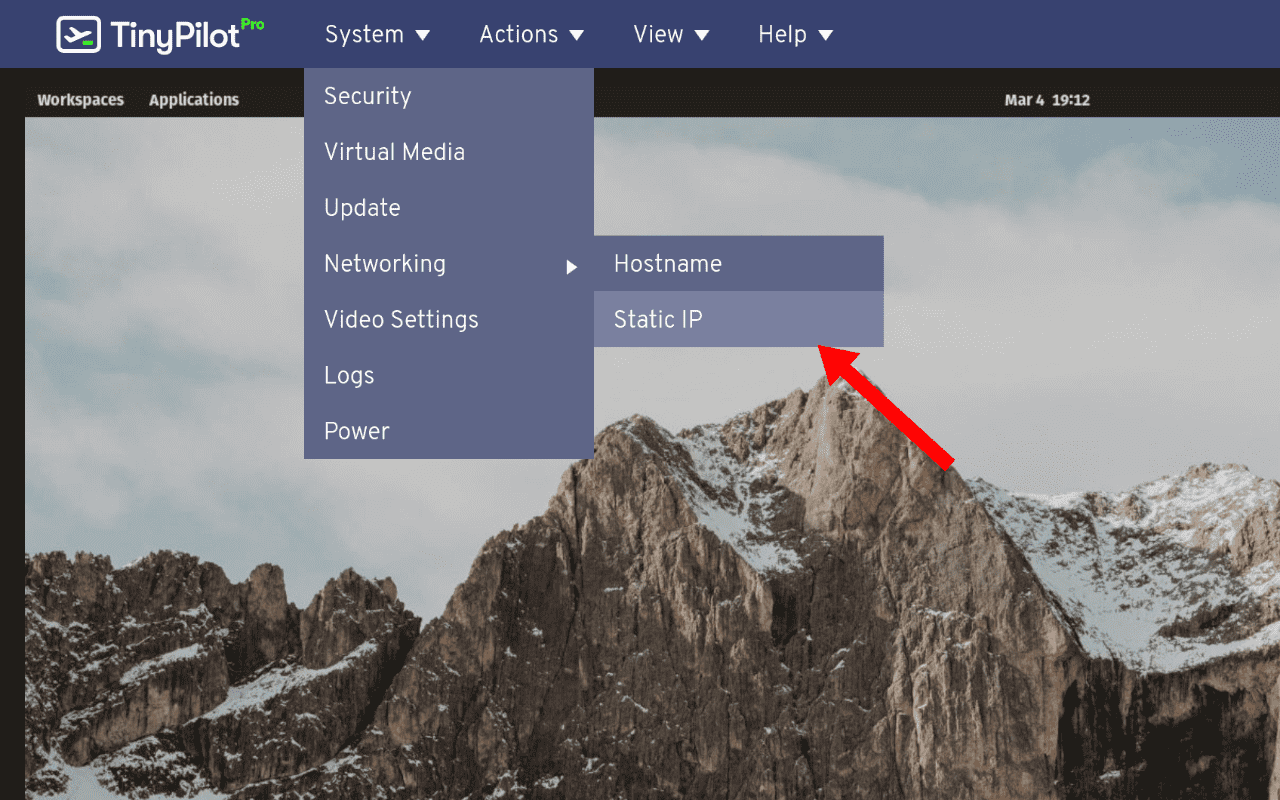
To set a static IP address through the web UI, navigate to the static IP address menu by going to System > Networking > Static IP.
In the Static IP dialog, enter your desired static IP address, your netmask, and your router's IP address, then click "Apply Static IP."
To remove a static IP address, navigate to the Static IP menu and click "Remove Static IP."
Assigning a static IP address via command-line interface (deprecated)
Warning: If you set incorrect values for your static IP address, you will no longer be able to access your TinyPilot over the network. You'll need to perform a factory reset to regain access to your device.
To set up a static IP address, SSH in to the Tinypilot and specify the settings for your network:
TINYPILOT_STATIC_IP="10.0.0.223/24" # Set to your desired IP address / netmask
ROUTERS="10.0.0.1"                  # Set to your router's IP address
# Choose your preferred DNS settings. The default DNS setting (below) queries
# your router's DNS, then Google (8.8.8.8), then Cloudflare (1.1.1.1).
DNS="${ROUTERS} 8.8.8.8 1.1.1.1"
Once you have specified your settings, run the following commands to apply the static IP address:
sudo /opt/tinypilot-privileged/scripts/set-static-ip \
  --ip "${TINYPILOT_STATIC_IP}" \
  --router "${ROUTERS}" \
  --dns "${DNS}" && \
  sudo reboot
Removing a static IP via command-line interface (deprecated)
To revert the changes above and use DHCP instead of a static IP address, run the following commands:
/opt/tinypilot-privileged/scripts/unset-static-ip && \
  sudo reboot
Join our mailing list, if you like
Find out about software updates, new products, discounts, and more.
Copyright © 2025, TinyPilot, LLC